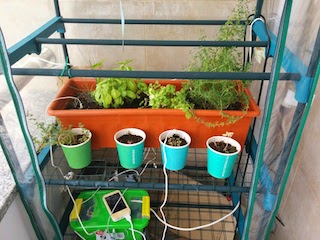
This is my Greenhouse, here I grow basil, thyme, coriander, parsley and other aromatic herbs which I enjoy using in my dishes. Having a greenhouse in my balcony is great, I have fresh herbs all year around. Problem being that I need to keep a constant look over it, checking humidity levels and watering.
There are several projects online by fellow makers in how to automate a greenhouse, monitoring humidity levels and triggering watering (either through a water pump or valve attached to a tap). These are all great, but lack an important feature: you can’t monitor the levels remotely, nor can you trigger watering on-demand.
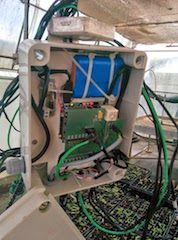
In my research work at Instituto de Telecomunicações, I recently got to do a project with Escola Superior Agronomia de Coimbra (ESAC) in which we setup several sensors in one of their greenhouses and provided monitoring and actuation capabilities to the agronomic engineers there. Project was quite successfully, and immediately decided to build a similar setup at home.
So lets go through the BOM:
- Greenhouse (AKI)
- Plants (IKEA FRÖER)
- Cables and connectors (scavenged IKEA DIODE)
- Arduino (Freaduino - operates at 3.3v and its easy to plug sensors)
- Valve (Electric Solenoid Valve for Water Air)
- Drip Watering Irrigation Kit (Am-tech)
- Relay Module (5V Relay Module for Arduino)
- Humidity Sensor (Soil Hygrometer)
- Temperature Sensor (Keyes DS18B20 Digital Temperature Sensor)
- Light Sensor(Photo Resistor)
- Radio (NRF24L01+)
- Plastic Storage Box (Any will do)
- Transistor (BC548 other will do)
- 1k Ω resistors (Resistors)
- assorted cables (Breadboard Jumper Wires)
- prototyping PCB (Glass Fiber Prototyping PCB Universal Board - Yellow )
- Electric cable (scavenged)
- CD-ROM cable (scavenged) - These are just wonderful to connect sensors! :)
- Sockets - used to simplify the connection of cables to the transistor (scavenged)
- Leftovers from a 3D printed Arduino case :) (you actually don’t need this part!)
Next step, bring everything together. I’ve create a diagram using fritzing, some parts do not match my BOM but you can clearly get a picture of what I have:
End result should look something like this:

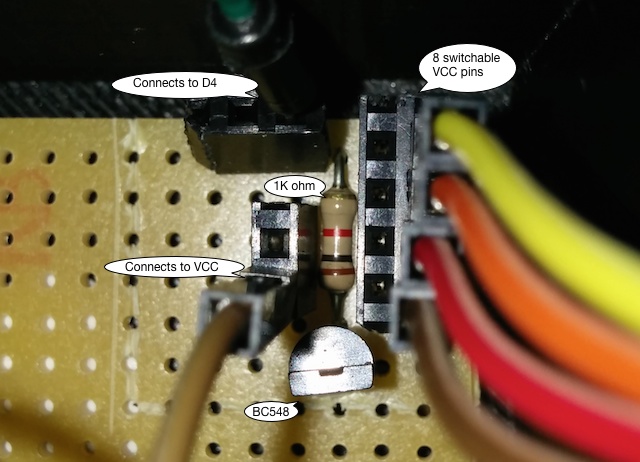
Some detail on the humidity sensors power control using a transistor:
Since the solenoid valve works with 12 volts, I used an external 12v power converter and put the relay in between:

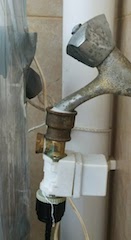
Here is my solenoid valve attached to the tap and to the dripping pipe:
Fitting everything inside the plastic box:
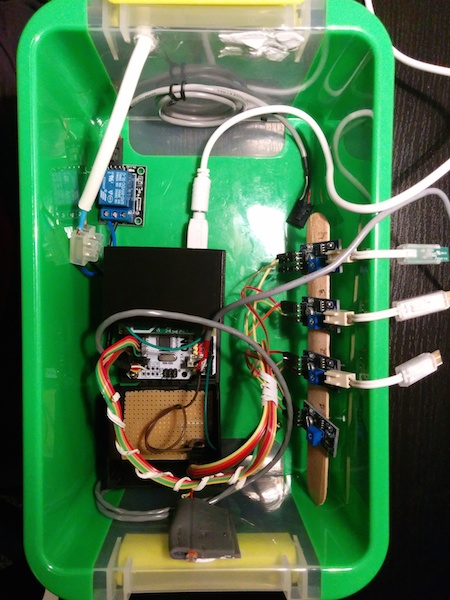
Ready to go:
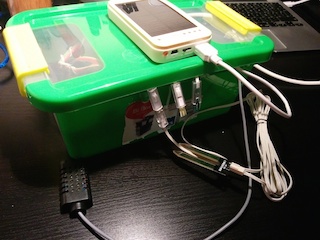
I’m currently powering the Arduino through a 10000mAh battery bank seen on top of the box which lasts for almost a full week. In the future I’ll probably buy a solar panel.
Next step, we need to program the Arduino. I’ve got some dependencies:
Since we need to define a protocol over the radio link, I’ve create a separate file (GreenhouseProtocol.h) which we will use on the other side to monitor/control the greenhouse.
Next step? Remote controlling the Greenhouse from afar. You already have everything you need to do this (GreenhouseProtocol.h), but I’ll be doing another post in the future about my RF Gateway that enables me not only to control the Greenhouse but also several other appliances in my house.
This is a work in progress post!
Drop your questions and comments below and I’ll work towards enhancing this post
